
Solar Charge Controller Sizing: Complete Calculator Guide with MPPT Selection
- Admin: IDAR Mohamed
- 01 Nov 2025
- 0
Choosing the correct solar charge controller size is crucial for system efficiency, battery protection, and maximizing your solar investment. An undersized controller limits power delivery and may overheat, while an oversized controller wastes money without providing benefits. Whether you're installing a 200W, 300W, 400W, or 1200W solar panel system, understanding how to size your charge controller ensures optimal performance and longevity.
This guide provides step-by-step calculations, sizing charts, and practical examples to help you select the perfect charge controller for your solar system, with special focus on MPPT (Maximum Power Point Tracking) controllers that deliver 20-30% more power than PWM alternatives.
Understanding Solar Charge Controllers
What is a Solar Charge Controller?
A solar charge controller regulates the voltage and current from solar panels to safely charge batteries. It prevents overcharging (which damages batteries), ensures efficient power transfer, and protects against reverse current flow at night.
MPPT vs PWM Controllers
| Feature | MPPT Controller | PWM Controller |
|---|---|---|
| Efficiency | 94-98% | 75-80% |
| Power Gain | 20-30% more power | Standard power |
| Best For | Systems >200W | Systems <200W |
| Voltage Conversion | Yes (steps down voltage) | No (direct connection) |
| Price | Higher ($100-500+) | Lower ($20-100) |
| Cold Weather Benefit | Significant | Minimal |
When to Choose MPPT:
- Solar array voltage significantly higher than battery voltage
- Systems over 200W
- Cold climates (panels produce higher voltage)
- Need maximum efficiency
When to Choose PWM:
- Small systems under 200W
- Panel voltage matches battery voltage closely
- Budget-constrained projects
- Simple installations
Basic Charge Controller Sizing Formula
The fundamental formula for sizing solar charge controllers:
Where:
- Solar Panel Watts = Total connected solar panel wattage
- Battery Voltage = System voltage (12V, 24V, or 48V)
- Safety Factor = 1.25 (125%) recommended minimum
Step-by-Step Calculation Process
Step 1: Determine Total Solar Panel Wattage
Add all connected solar panels:
- Single 300W panel = 300W total
- Three 200W panels = 600W total
- Four 300W panels = 1200W total
Step 2: Identify Battery Bank Voltage
Common system voltages:
- 12V systems: Small RVs, boats, cabins (<1000W)
- 24V systems: Medium systems (1000-3000W)
- 48V systems: Large off-grid homes (>3000W)
Step 3: Calculate Required Amperage
Step 4: Apply Safety Margin
Step 5: Select Standard Controller Size
Choose the next standard size up:
- Common sizes: 10A, 20A, 30A, 40A, 50A, 60A, 80A, 100A
Charge Controller Sizing Chart
Quick Reference: Controller Size by Solar Panel Wattage
| Solar Panel Size | 12V System | 24V System | 48V System | Recommended MPPT Size |
|---|---|---|---|---|
| 100W | 10A | 6A | 3A | 10-15A |
| 200W | 20A | 10A | 5A | 20-30A |
| 300W | 30A | 15A | 8A | 30-40A |
| 400W | 40A | 20A | 10A | 40-50A |
| 600W | 60A | 30A | 15A | 60-80A |
| 800W | 80A | 40A | 20A | 80-100A |
| 1000W | 100A | 50A | 25A | 100A |
| 1200W | 120A | 60A | 30A | 100-150A |
info
💡 Pro Tip: Always round up to the next standard controller size. The extra capacity provides safety margin and allows for future system expansion.
Detailed Sizing Examples
Example 1: 300W Solar Panel System
Given:
- Solar panel: 300W
- Battery bank: 12V
- Controller type: MPPT
Calculation:
Step 1 - Base Amperage:
Step 2 - Safety Margin:
Step 3 - Controller Selection: Next standard size = 40A MPPT controller
Verification:
- 40A controller can handle: 40A × 12V = 480W
- Safety margin: 480W - 300W = 180W (60% headroom) ✓
Example 2: 400W Solar Panel System
Given:
- Solar panels: 400W total
- Battery bank: 12V
- Controller type: MPPT
Calculation:
Step 1 - Base Amperage:
Step 2 - Safety Margin:
Step 3 - Controller Selection: Next standard size = 50A MPPT controller
Alternative for 24V System:
Selection = 30A MPPT controller (more cost-effective)
Example 3: 1200W Solar Panel Array
Given:
- Solar panels: Four 300W panels = 1200W
- Battery bank: 24V (recommended for this size)
- Controller type: MPPT
Calculation:
Step 1 - Base Amperage:
Step 2 - Safety Margin:
Step 3 - Controller Selection: Recommended = 80A MPPT controller
For 12V System (not recommended):
- Required: 100A × 1.25 = 125A
- Would need expensive 150A controller
- Better solution: Use 24V or 48V system
Example 4: 200W Solar Panel
Given:
- Solar panel: 200W
- Battery bank: 12V
- Budget installation
Calculation:
Step 1 - Base Amperage:
Step 2 - Safety Margin:
Step 3 - Controller Selection:
Option A - PWM (Budget):
- 30A PWM controller (~$30-50)
- Adequate for simple systems
- 75-80% efficiency
Option B - MPPT (Performance):
- 30A MPPT controller (~$100-150)
- 20-30% more power harvest
- Better for cold climates
Advanced Sizing Considerations
Temperature Effects on Solar Output
Solar panels lose efficiency in high temperatures but produce higher voltage in cold weather:
Temperature Derating Factors:
| Climate | Temperature Range | Panel Output Factor | Voltage Increase |
|---|---|---|---|
| Hot Desert | 100-120°F (38-49°C) | 0.85-0.90 | Minimal |
| Temperate | 60-90°F (16-32°C) | 0.95-1.00 | 5-10% |
| Cold | 0-40°F (-18-4°C) | 1.00-1.10 | 15-25% |
| Arctic | -20-0°F (-29--18°C) | 1.10-1.15 | 25-35% |
Impact on Sizing:
- Hot climates: Panels produce less power, but standard 25% margin sufficient
- Cold climates: Higher voltage requires controller with adequate voltage rating
warning
⚠️ Important: Verify your charge controller's maximum input voltage against cold temperature panel voltage. In extreme cold, panel voltage can exceed controller limits and cause damage.
Multiple Panel Configurations
When connecting multiple solar panels, configuration affects controller sizing:
Series Connection
- Voltage: Adds up (2 × 18V panels = 36V)
- Current: Stays same
- Advantage: Reduces wire losses, enables MPPT efficiency
- Controller sizing: Based on total wattage
Parallel Connection
- Voltage: Stays same
- Current: Adds up (2 × 5A panels = 10A)
- Advantage: Simpler wiring, shade tolerance
- Controller sizing: Must handle combined current
Series-Parallel Combination
For large arrays (1200W+):
- Combines benefits of both
- Optimizes voltage for MPPT
- Reduces current for safer wiring
Example - 1200W Array (Four 300W Panels):
Configuration Option 1 - All Parallel (12V):
- Voltage: ~18V (panel Vmp)
- Current: ~67A combined
- Requires: 100A controller minimum
Configuration Option 2 - Series-Parallel (24V):
- Two strings of two panels each
- Voltage: ~36V (matches 24V system)
- Current: ~33.5A per string = 67A total
- Requires: 80A controller
- More efficient MPPT operation
Wire Sizing Impact
Proper wire sizing between panels and controller affects system efficiency:
Voltage Drop Limits:
- Maximum 3% recommended for solar circuits
- Lower voltage drop = higher efficiency
- Larger controllers may need heavier wire
Wire Size Quick Reference:
| Current | Distance | 12V Wire Size | 24V Wire Size |
|---|---|---|---|
| 20A | 10 feet | 10 AWG | 12 AWG |
| 20A | 20 feet | 8 AWG | 10 AWG |
| 40A | 10 feet | 6 AWG | 8 AWG |
| 40A | 20 feet | 4 AWG | 6 AWG |
| 60A | 10 feet | 4 AWG | 6 AWG |
| 60A | 20 feet | 2 AWG | 4 AWG |
Choosing the Right MPPT Controller
Key Selection Criteria
1. Maximum Input Voltage
- Must exceed panel Voc in cold weather
- Add 25% safety margin
- Common ratings: 100V, 150V, 250V
2. Maximum Output Current
- Should exceed calculated amperage + 25%
- Determines battery charging capacity
3. System Voltage Compatibility
- Auto-detection: 12V/24V or 12V/24V/48V
- Fixed voltage: Specific to one voltage
4. Efficiency Rating
- Look for >95% peak efficiency
- Matters more for larger systems
5. Battery Type Compatibility
- Lead-acid (Flooded, AGM, Gel)
- Lithium (LiFePO4, Li-ion)
- Programmable charging profiles
Top MPPT Controller Recommendations
| Size Range | Best Budget | Best Mid-Range | Best Premium |
|---|---|---|---|
| 10-30A | Renogy Rover 20A | Victron SmartSolar 30A | Morningstar TriStar 30A |
| 40-60A | EPever MPPT 40A | Victron SmartSolar 50A | Outback FlexMax 60A |
| 80-100A | EPever 100A | Victron SmartSolar 100/50 | Midnite Classic 150 |
Common Sizing Mistakes to Avoid
Mistake 1: Using Only Panel Wattage Without Safety Margin
Wrong Calculation:
- 300W panel ÷ 12V = 25A
- Choose 25A controller
Correct Calculation:
- 300W panel ÷ 12V = 25A × 1.25 = 31.25A
- Choose 40A controller
Why it matters: Controllers running at maximum capacity overheat and fail prematurely.
Mistake 2: Ignoring System Voltage Options
Poor Choice:
- 1200W system on 12V
- Requires expensive 150A controller
- Heavy, expensive wire
Better Choice:
- 1200W system on 24V or 48V
- Requires 60-80A controller (24V) or 30-40A (48V)
- Lighter wire, lower costs
Mistake 3: Not Accounting for Future Expansion
Short-sighted:
- Buy controller sized exactly for current panels
- Need complete replacement when expanding
Future-proof:
- Buy controller one size larger
- Allows 20-30% expansion without replacement
Mistake 4: Choosing PWM for Large Systems
Inefficient:
- 400W panels with PWM controller
- Losing 20-30% potential power
- Wasting ~80-120W continuously
Smart Choice:
- 400W panels with MPPT controller
- Captures full power potential
- Extra ~80-120W daily
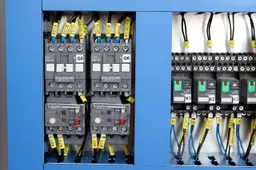
Installation Best Practices
Proper Controller Placement
Location Requirements:
- Well-ventilated area
- Protected from weather
- Away from battery gases
- Temperature range: -4°F to 140°F (-20°C to 60°C)
- Near battery bank (short wiring)
Wiring Connection Order
Correct Sequence:
- First: Connect controller to battery
- Second: Connect solar panels to controller
- Third: Connect loads (if applicable)
Why this order? Controller needs battery voltage reference before solar input.
Safety Considerations
Required Protection:
- Fuse/breaker between panels and controller: Size at 125% of controller max input current
- Fuse/breaker between controller and battery: Size at 125% of controller max output current
- Proper grounding: Both equipment and system grounding
Victron MPPT Calculator Method
Victron Energy provides an excellent online MPPT calculator. Here's how to use it effectively:
Input Requirements:
- Solar panel specifications (Voc, Vmp, Isc, Pmax)
- Number of panels
- Battery voltage
- Temperature range
Calculator Outputs:
- Recommended controller model
- Maximum number of panels in series
- Optimal series/parallel configuration
- Wire sizing recommendations
Pro Tip: Even if not buying Victron, use their calculator for sizing validation.
Real-World Application Scenarios
Scenario 1: RV Solar System
Requirements:
- Weekend/vacation use
- 400W solar panels
- 12V battery bank (200Ah)
- Limited roof space
Solution:
- 400W ÷ 12V = 33.3A × 1.25 = 41.6A
- Recommended: 50A MPPT controller
- Model suggestion: Victron SmartSolar 50/100 or Renogy Rover 40A
Scenario 2: Off-Grid Cabin
Requirements:
- Daily use
- 1200W solar array
- 24V battery bank (400Ah)
- Year-round operation
Solution:
- 1200W ÷ 24V = 50A × 1.25 = 62.5A
- Recommended: 80A MPPT controller
- Model suggestion: Victron SmartSolar 100/50 or Midnite Classic 150
Scenario 3: Backup Power System
Requirements:
- Grid-tie backup
- 600W solar panels
- 48V battery bank
- Minimal maintenance
Solution:
-
600W ÷ 48V = 12.5A × 1.25 = 15.6A
-
Recommended: 20A or 30A MPPT controller
-
Model suggestion: Victron SmartSolar 30A or Morningstar TriStar
Conclusion: Getting Your Solar Controller Size Right
Proper charge controller sizing directly impacts your solar system's efficiency, battery lifespan, and overall performance. By following the fundamental formula—dividing total solar watts by battery voltage and adding 25% safety margin—you ensure reliable operation and protection for your investment.
Key Takeaways:
- Always add 25% safety margin to calculated amperage
- Choose MPPT for systems over 200W for 20-30% efficiency gain
- Consider higher system voltages (24V or 48V) for panels over 600W
- Select next standard size up when between sizes
- Verify voltage ratings for cold climate installations
- Plan for future expansion by choosing slightly larger controllers
Whether you're sizing a controller for a 200W portable solar panel or a 1200W off-grid array, these principles ensure safe, efficient operation for years to come.
🔗 Related Posts
- Solar Panel Wire Sizing: Complete Guide with Calculator, Charts & NEC Requirements
- How Solar Panels Work: A Comprehensive Guide
- Wire Size Calculator: Complete Guide with Single Phase, 3-Phase & DC Calculations
- Complete Guide to Voltage Drop: Calculations, Tables & Calculators
- Circuit Breaker Sizing: Complete Guide with Wire Size Charts & NEC Code Requirements
Helpful Calculators
- Voltage Drop Calculator
- Ohm's Law Calculator
- Power Factor Calculator
- Capacitor and Inductor Reactance Calculator
Credits
- Photo by Evgeniy Alyoshin on Unsplash
⭐ Was this article helpful?
IDAR Mohamed
Electrical Engineer
Electrical Engineer specialized in power systems, electrical installations, and energy efficiency. Passionate about simplifying complex electrical concepts into practical guides. (University of applied sciences graduate, with experience in HV/LV systems and industrial installations.)
- Charge Controller Sizing
- MPPT Calculator
- Battery Charging